Configuration Manager Feature Update Loop
Fix SCCM Feature Update Loop: Troubleshooting Guide
To understand this problem, remember that SCCM is only attempting to launch the setup file for the feature update. The feature update is failing, and SCCM continues to try to run the setup. As part of the setup process the PC must reboot—hence the loop after the setup failure.
Reviewing Windows Setup Logs
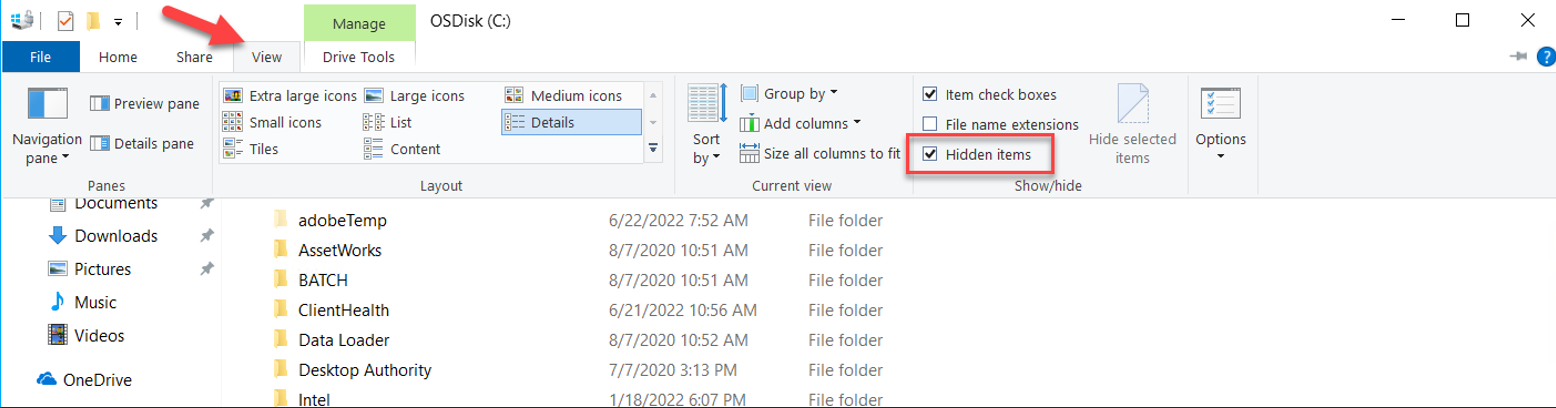
First, enable Show hidden items in File Explorer, then browse to:
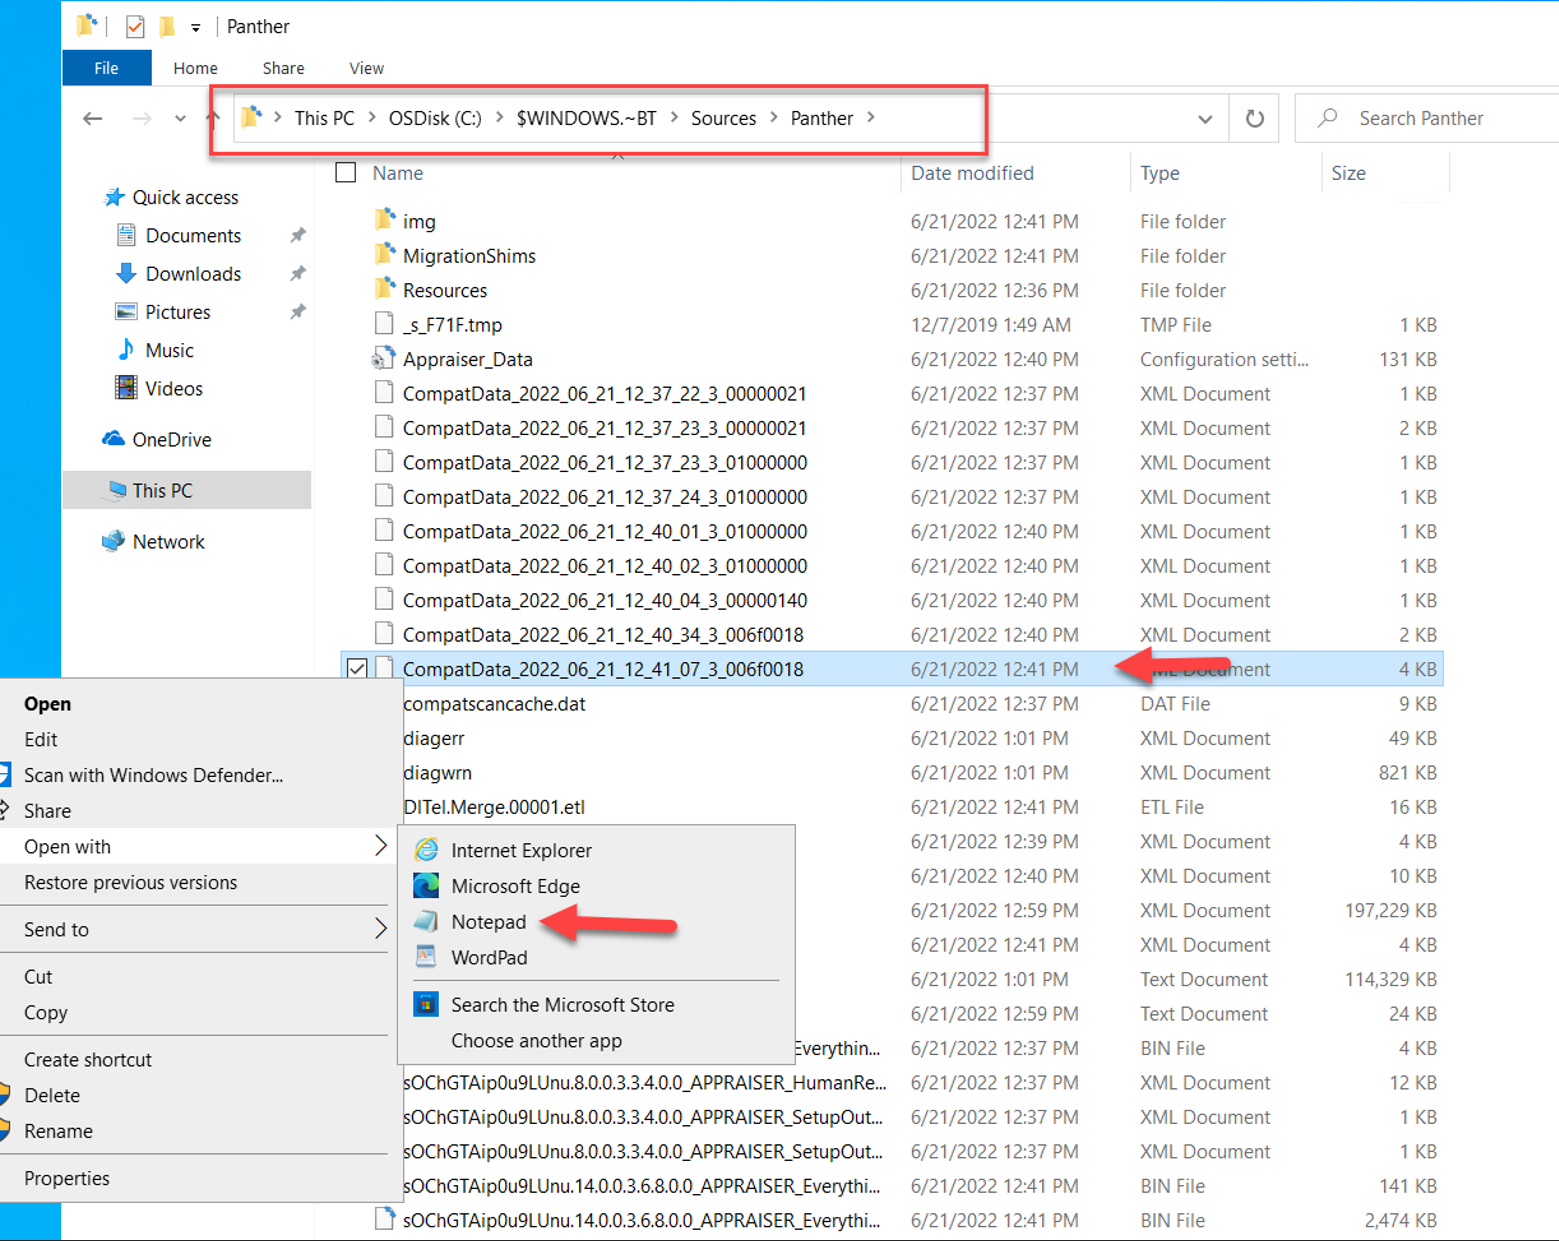
C:\$WINDOWS.~BT\Sources\Panther
Here you will find the setup error logs. You can read through the logs to determine what the problem is.
Typically, you can start searching online for the 0x800xxxxx error codes to uncover the cause.
Checking CompatData Files
In this case, the setup logs indicated a driver failure. Next, review the CompatData files.
Open the latest CompatData file by date (likely the one the setup failed on). Open it in Notepad:
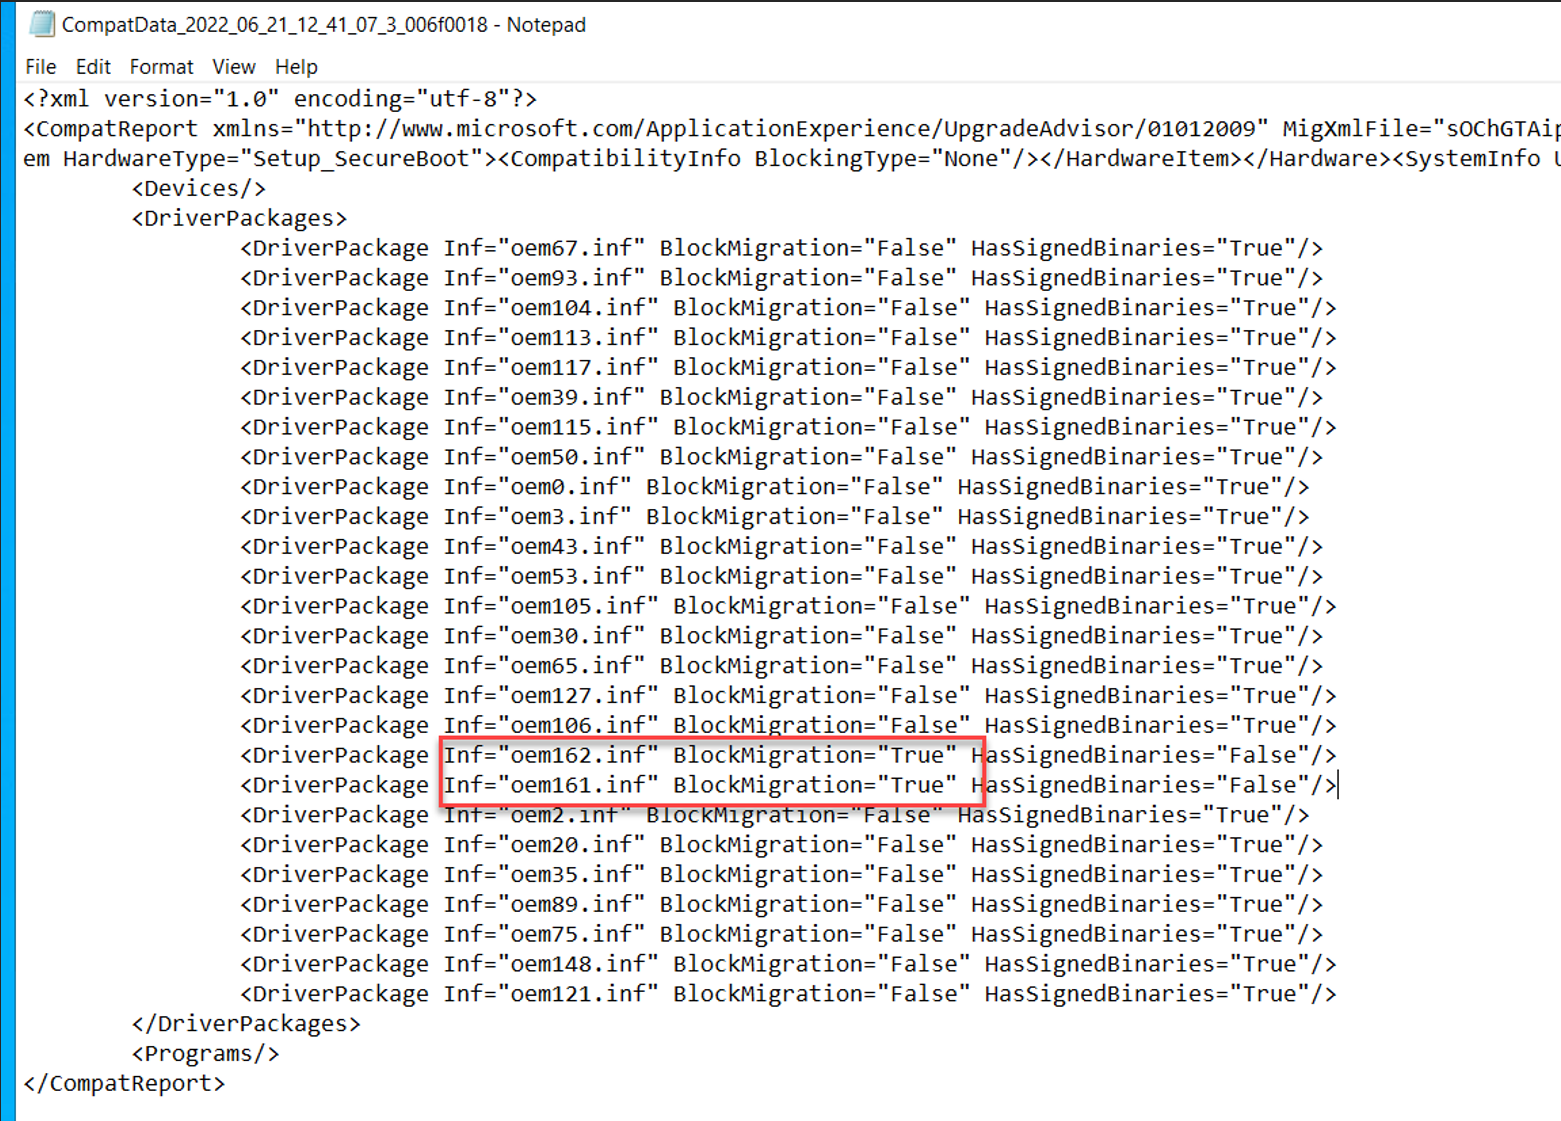
As shown above, oem162.inf and oem161.inf blocked the migration to the new feature update.
Tip:
If the CompatData files do not list any drivers blocking the migration, then the issue is likely caused by something else. Still, review the setup logs thoroughly.
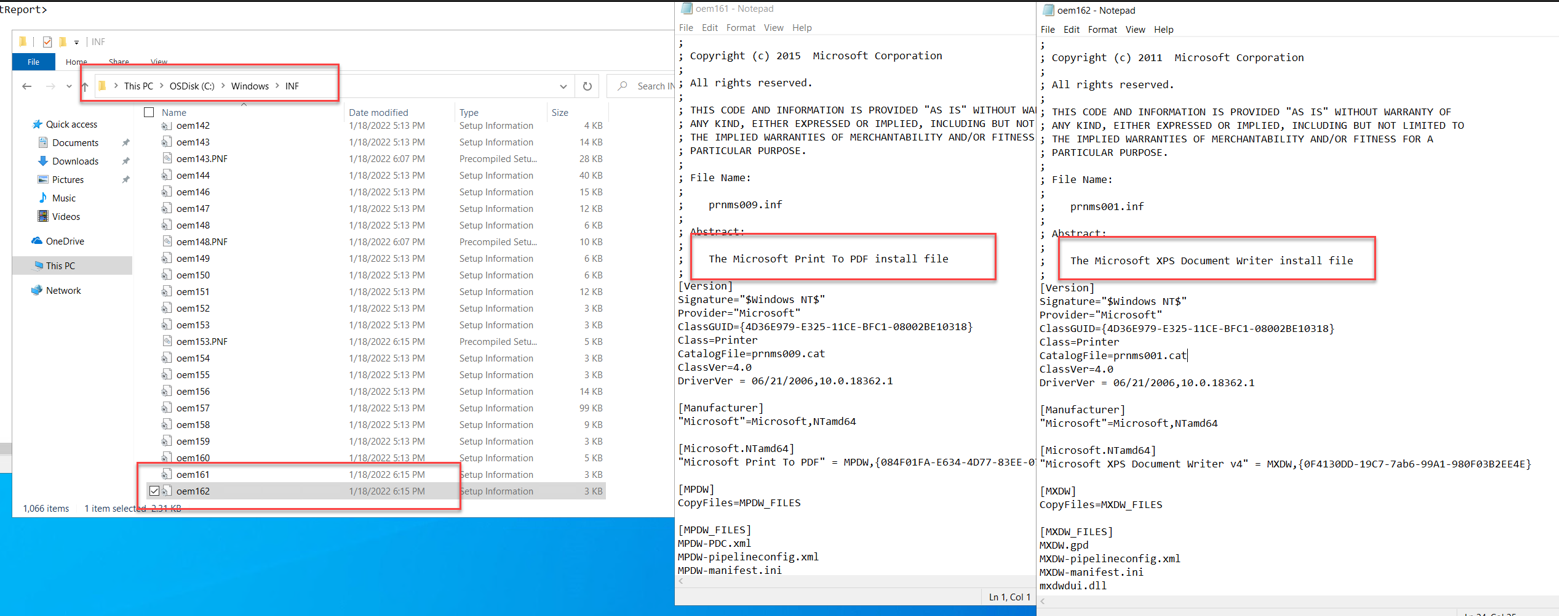
These two INF files are located at:
C:\Windows\INF
They correspond to:
- Microsoft Print to PDF
- Microsoft XPS Document Writer
To proceed with the upgrade, these features must be turned off:
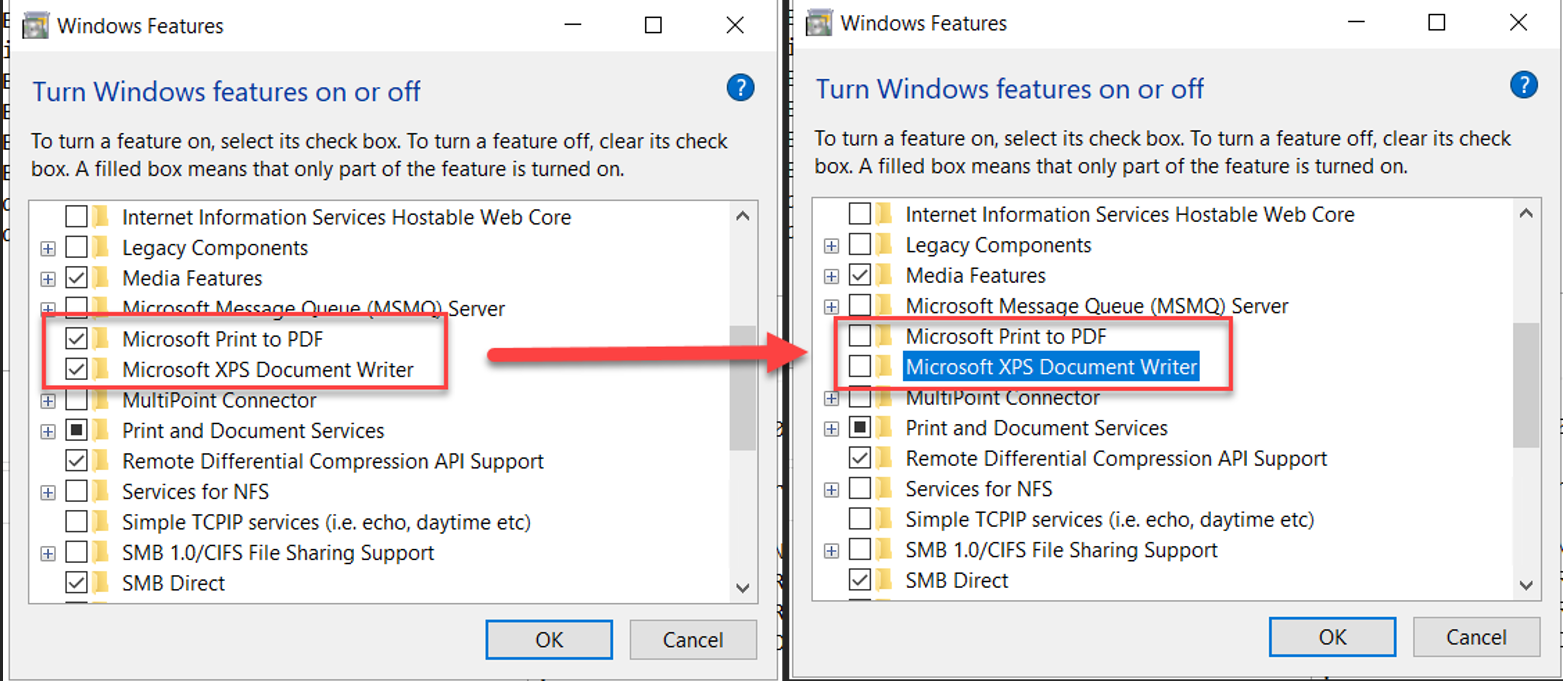
Click OK.
Then reboot the PC to clear the SCCM restart prompt.
Resetting Update Components
Once the PC boots up again, open an elevated Command Prompt and run the following commands:
net stop wuauserv
net stop bits
rename c:\windows\SoftwareDistribution SoftwareDistribution.bak
rename c:\$WINDOWS.~BT c:\$WINDOWS.~BT.old
net start wuauserv
net start bits
This resets the installation through SCCM. You can now attempt to install the feature update again. SCCM will re-download and re-install the update, and the upgrade should complete successfully.